



Building Drupal Canvas Code Components with React and Tailwind CSS

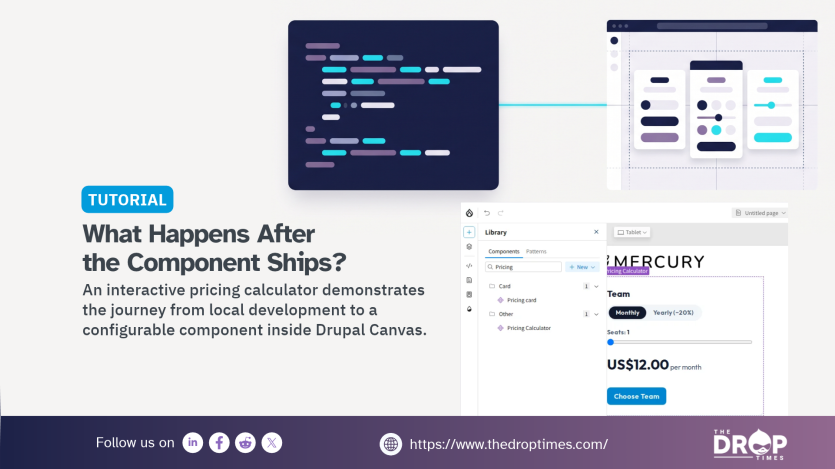
Front-end developers who already work in React can build components for Drupal Canvas, the visual page builder in Drupal CMS, and push them to a site from their own code editor. In this tutorial, you will build a pricing calculator in TypeScript and Tailwind CSS, preview it locally, push it to a Drupal CMS site, place it on a page in the Canvas editor and test it on the published page.
The walkthrough uses Canvas 1.12.0 and version 0.26.2 of the Canvas command-line tool (CLI). In Step 8, the push excludes pages, content templates and page templates. The CLI can still synchronise global CSS and other selected assets, so review its proposed changes before confirming.
Dries Buytaert discussed this workflow during his keynote at DrupalCon Rotterdam 2026 on 29 September 2026. In his written version of the keynote, published on 7 October 2026, he described Canvas code components as using familiar JavaScript development tools and workflows. See his State of Drupal presentation.
What You Will Build
A code component consists of a React-compatible component and a component.yml file describing its props and slots. Canvas stores it on the site, and editors place it on pages like other available components. Canvas renders code components using Preact with its React compatibility layer, as described in the Canvas documentation.
By the end, you will have:
- a Drupal CMS site with an OAuth client for the Canvas CLI
- a local code component project created with
@drupal-canvas/create - a Pricing Calculator written in TypeScript and styled with Tailwind CSS: editors set the plan, price, discount and currency in Canvas, while visitors choose the billing period and seat count on the page
- the component previewed in Canvas Workbench, pushed to the site, placed on a Canvas page and published
When a Code Component Is the Right Choice
Canvas can place different kinds of components on a page. Theme components written in Twig render markup supplied by the theme. A View lists Drupal content. A block can include a form or other functionality. A code component lets a front-end developer build an interactive component with JavaScript and push it to the site from a separate project. Choose a code component when:
- the component needs browser-side state, such as a calculator, configurator, filter or toggle that responds without reloading the page
- a front-end team needs its own tooling, including TypeScript, Tailwind CSS, Workbench and ESLint, without adding the component source to the Drupal site repository
- editors should configure component props through a form generated by Canvas
- the component may also be used in a supported React-based headless Canvas implementation, such as the Next.js or TanStack Start starters
Use a View for a content list and a theme component for static markup where those options fit. The pricing calculator here meets the first three conditions.
Canvas Is Stable, but Its APIs Are Internal and the CLI Is Pre-1.0
Drupal Canvas 1.12.0 was released on 25 September 2026 as a stable Drupal.org release. Drupal CMS 2.2 requires Canvas 1.11 or later. See Canvas releases.
The versions of the Canvas CLI, Canvas Workbench and @drupal-canvas/create used in this walkthrough were published on npm in September 2026. The CLI and Workbench are pre-1.0 packages, so command options and development workflows may change.
The API.md file shipped with Canvas 1.12.0 continues to warn that Canvas does not yet expose stable public APIs. The CLI uses versioned /canvas/api/v0 endpoints described by the module’s OpenAPI specification. Treat integrations with those endpoints as version-specific rather than as a stable public contract.
Prerequisites
The steps were tested for The DropTimes on 5 November 2026 with the following versions:
| Component | Version tested |
|---|---|
| Drupal CMS | 2.2.8 |
| Drupal core | 11.4.11 |
| Drupal Canvas | 1.12.0 |
| Simple OAuth | 6.1.4 |
| Consumers | 8.x-1.24 |
| PHP | 8.3.30 |
| Node.js | 22.23.3 |
@drupal-canvas/create | 1.9.1 |
@drupal-canvas/cli | 0.26.2 |
@drupal-canvas/workbench | 0.13.2 |
Use Simple OAuth 6.1.4 or later on the 6.1.x branch. Version 6.1.4 addresses SA-CONTRIB-2026-296, a Critical access-bypass advisory published on 4 November 2026. Version 6.1.3 addressed an earlier advisory but is no longer security-current. Review permissions for creating and editing OAuth consumers when updating.
You need:
- A Drupal CMS site running in DDEV, installed with the Starter site template. The project’s DDEV configuration requires DDEV 1.25.0 or later. Update DDEV if
ddev startreports a version constraint error. The example site URL ishttps://tdt-canvas.ddev.site; use your own URL. - A supported Node.js release. The walkthrough used 22.23.3, matching the generated project’s
.nvmrc. Validation, push and Workbench were also tested on Node.js 26.13.0, which entered LTS on 28 October 2026. The CLI’s supported runtime requirements depend on its installed version. - An administrator account for initial site configuration. For ongoing OAuth use outside a local test environment, assign only the Drupal permissions and Canvas scopes required for the intended operations.
How to create the site. In an empty project folder, run ddev config --project-type=drupal11 --docroot=web and ddev start, followed by ddev composer create-project drupal/cms:^2.2, ddev composer require drupal/drupal_cms_starter and ddev drush site:install --yes. The first commands follow the DDEV Drupal CMS quickstart. The Starter template installs Mercury as the default theme and provides the page template discussed in Step 8. Requiring Starter before site:install lets the installation use it without downloading it at that stage.
HTTPS. DDEV serves the site over HTTPS using a certificate issued by the local mkcert authority. With that authority installed using mkcert -install, the browser, curl and Canvas CLI accepted the test URL without extra settings. If Node.js rejects the certificate, consult the mkcert documentation and configure the trusted local CA rather than disabling TLS checks. One option is export NODE_EXTRA_CA_CERTS="$(mkcert -CAROOT)/rootCA.pem".
Step 1: Install Canvas OAuth
The Canvas CLI authenticates through OAuth 2.0 using the Canvas OAuth submodule, which depends on Simple OAuth. From the root of the Drupal CMS project, install Simple OAuth and enable Canvas OAuth:
ddev composer require 'drupal/simple_oauth:^6'
ddev drush en canvas_oauth -y
On a fresh site, Drush reports that canvas_oauth, simple_oauth, serialization and consumers have been enabled. The list is shorter if a dependency is already enabled. Check that the OAuth client tables exist:
ddev drush sqlq "show tables like 'consumer__%'"A working installation lists consumer_field_data and tables such as consumer__authorization_code_scopes, consumer__grant_types, consumer__redirect and consumer__scopes. If only consumer_field_data appears, consult Troubleshooting before moving on.
Step 2: Create the Signing Keys
Simple OAuth signs access tokens with an RSA key pair. Keep the private key outside the web root. For a Drupal CMS project with web/ as its web root, a keys/ directory in the project root is suitable for local development:
mkdir keys
ddev exec 'openssl genrsa -out /var/www/html/keys/private.key 2048'
ddev exec 'openssl rsa -in /var/www/html/keys/private.key -pubout -out /var/www/html/keys/public.key'
ddev exec 'chmod 600 /var/www/html/keys/private.key'
ddev drush cset simple_oauth.settings public_key /var/www/html/keys/public.key -y
ddev drush cset simple_oauth.settings private_key /var/www/html/keys/private.key -y
On a new site, Drush may ask to create the key entries in simple_oauth.settings; -y answers yes. The paths can also be configured through the Public Key and Private Key fields at /admin/config/people/simple_oauth. Do not commit private keys to version control. The Drupal CMS project’s default .gitignore does not exclude keys/, so add it explicitly:
echo 'keys/' >> .gitignoreStep 3: Create an OAuth Client for the CLI
Open /admin/config/services/consumer/add and configure a local test client:
- Enter a Label, such as Canvas CLI (local), and a Client ID, such as
canvas-cli. - Enter a New Secret and store it securely.
- Under Grant types, select Client Credentials.
- Under Client Credentials settings, select the
canvas:scopes requested by the CLI. The local walkthrough selected all available Canvas scopes to avoidinvalid_scopeerrors, including requests forcanvas:media:document:create. Do not grant every scope by default on a shared or production site; review the required scope set and access controls first. - Choose a non-anonymous account in the required User field. Changes performed through the client are associated with this account; its permissions must be appropriate for the task.
- Leave Is Confidential? selected and save.
Test the credentials with a token request. Replace the example ID and secret with your own local values:
curl -X POST https://tdt-canvas.ddev.site/oauth/token \
  -d "grant_type=client_credentials&client_id=canvas-cli&client_secret=YOUR-SECRET&scope=canvas:js_component"
A successful response is JSON containing a bearer token, an access_token value and an expiry. In the tested configuration, expires_in was 300 seconds. This request checks a single scope; the CLI uses a broader default scope set and can fail with invalid_scope if its required scopes are not granted.
Individual developers can alternatively use npx canvas login with the Authorization Code grant and Proof Key for Code Exchange (PKCE), as described in the Canvas OAuth module README.
Step 4: Scaffold the Component Project
Switch to a supported Node.js version. In a folder outside the Drupal project, run:
npx -y @drupal-canvas/create my-components --site-url https://tdt-canvas.ddev.site
cd my-components
The scaffolding tool downloads the default template, installs npm dependencies, creates an .env file and starts a Git repository. The generated project includes:
- the Canvas CLI, Workbench and an ESLint configuration
- Tailwind CSS loaded through
src/global.css - example components in the
examples/folder - skills for AI coding agents in
.agents/skills/, including assets from drupal-canvas/skills. The related The DropTimes guide to AI coding agents explains how such files andAGENTS.mdcan guide coding agents on Drupal projects.
The default template is Nebula (template ID default, previously acquia-nebula). Its package.json identifies Acquia Engineering as its author and links to an Acquia GitHub repository.
Open .env and replace the template’s example credentials:
CANVAS_SITE_URL="https://tdt-canvas.ddev.site"
CANVAS_CLIENT_ID=canvas-cli
CANVAS_CLIENT_SECRET=YOUR-SECRET
Leave the commented-out CANVAS_SCOPE entry as supplied by the tested template; its list was older than the CLI’s default scope set. Do not commit .env to version control. The template already excludes it in .gitignore.
With the 1.9.1 template, the CLI reported that canvas.config.json contained obsolete global-region settings after Canvas moved to page templates. For the tested component-only project, remove regionsDir, layoutPath and sync.regions so the configuration reads:
{
  "componentDir": "src/components",
  "pagesDir": "pages",
  "contentTemplatesDir": "content-templates",
  "globalCssPath": "src/global.css",
  "sync": {
    "pages": true,
    "contentTemplates": true
  }
}
Step 5: Create the Component
Use the CLI to scaffold a new component:
npx canvas scaffold --name pricing_calculatorIt creates src/components/pricing_calculator/ with component.yml, index.jsx and index.css. In the tested CLI version, the generated metadata still used machineName: hello-world and status: false, regardless of the folder name. Edit both values. A component set to status: false is not offered in the editor’s component list.
Delete the generated JavaScript and CSS files before adding the TypeScript component:
rm src/components/pricing_calculator/index.jsx src/components/pricing_calculator/index.cssReplace src/components/pricing_calculator/component.yml with:
name: Pricing Calculator
machineName: pricing_calculator
status: true
required:
  - planName
  - monthlyPrice
props:
  properties:
    planName:
      type: string
      title: Plan name
      examples:
        - Team
    monthlyPrice:
      type: number
      title: Monthly price
      examples:
        - 12
    annualDiscount:
      type: integer
      title: Annual discount
      description: Percentage taken off when billed yearly
      examples:
        - 20
    currency:
      type: string
      enum:
        - USD
        - EUR
        - INR
      meta:enum:
        USD: US dollar
        EUR: Euro
        INR: Indian rupee
      title: Currency
      examples:
        - USD
    maximumSeats:
      type: integer
      title: Maximum seats
      examples:
        - 50
    signupLink:
      type: string
      format: uri-reference
      title: Signup link
      examples:
        - /signup
slots: {}
dataDependencies: {}
Each prop is described using JSON Schema-style metadata. The examples values supply defaults for the component preview and initial editor values. Number and integer props create numeric fields; enum with meta:enum creates a select field with human-readable labels, and description adds help text. See Canvas component metadata documentation.
Create src/components/pricing_calculator/index.tsx:
import { useState } from 'react';
import { cn } from 'drupal-canvas';

type Billing = 'monthly' | 'yearly';

interface PricingCalculatorProps {
  planName: string;
  monthlyPrice: number;
  annualDiscount?: number;
  currency?: 'USD' | 'EUR' | 'INR';
  maximumSeats?: number;
  signupLink?: string;
}

const PricingCalculator = ({
  planName,
  monthlyPrice,
  annualDiscount = 0,
  currency = 'USD',
  maximumSeats = 50,
  signupLink = '/signup',
}: PricingCalculatorProps) => {
  const [billing, setBilling] = useState<Billing>('monthly');
  const [seats, setSeats] = useState(1);

  const months = billing === 'yearly' ? 12 : 1;
  const discount = billing === 'yearly' ? 1 - annualDiscount / 100 : 1;
  const total = seats * monthlyPrice * months * discount;
  const money = new Intl.NumberFormat(undefined, { style: 'currency', currency });

  const params = new URLSearchParams({
    plan: planName,
    billing,
    seats: String(seats),
  });
  const href = `${signupLink}${signupLink.includes('?') ? '&' : '?'}${params}`;

  const toggle = (value: Billing) =>
    cn(
      'rounded-full px-4 py-1 text-sm font-semibold',
      billing === value ? 'bg-gray-900 text-white' : 'text-gray-600',
    );
  return (
    <article className="max-w-sm rounded-xl border border-gray-200 p-6 shadow-sm">
      <h3 className="text-xl font-bold text-gray-900">{planName}</h3>
      <div className="mt-3 inline-flex rounded-full bg-gray-100 p-1">
        <button type="button" className={toggle('monthly')} onClick={() => setBilling('monthly')}>
          Monthly
        </button>
        <button type="button" className={toggle('yearly')} onClick={() => setBilling('yearly')}>
          Yearly{annualDiscount > 0 && ` (−${annualDiscount}%)`}
        </button>
      </div>
      <label className="mt-4 block text-sm text-gray-600">
        Seats: <span className="font-semibold text-gray-900">{seats}</span>
        <input
          type="range"
          min={1}
          max={maximumSeats}
          value={seats}
          onChange={(event) => setSeats(Number(event.currentTarget.value))}
          className="mt-1 w-full"
        />
      </label>
      <p className="mt-4 text-3xl font-bold text-gray-900">
        {money.format(total)}
        <span className="text-base font-normal text-gray-600">
          {' '}
          per {billing === 'yearly' ? 'year' : 'month'}
        </span>
      </p>
      <a
        href={href}
        className="mt-4 inline-block rounded-lg bg-sky-600 px-4 py-2 font-semibold text-white hover:bg-sky-700"
      >
        Choose {planName}
      </a>
    </article>
  );
};

export default PricingCalculator;
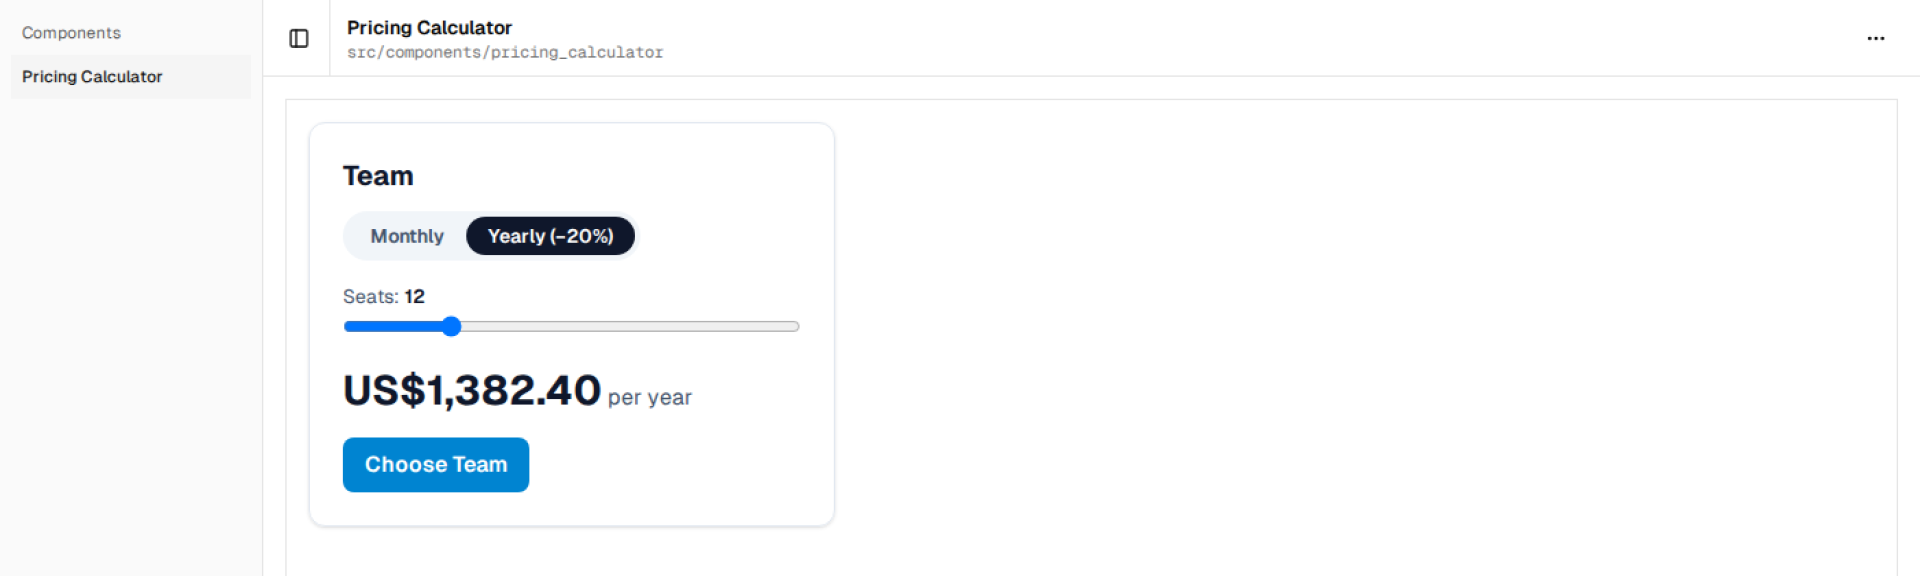
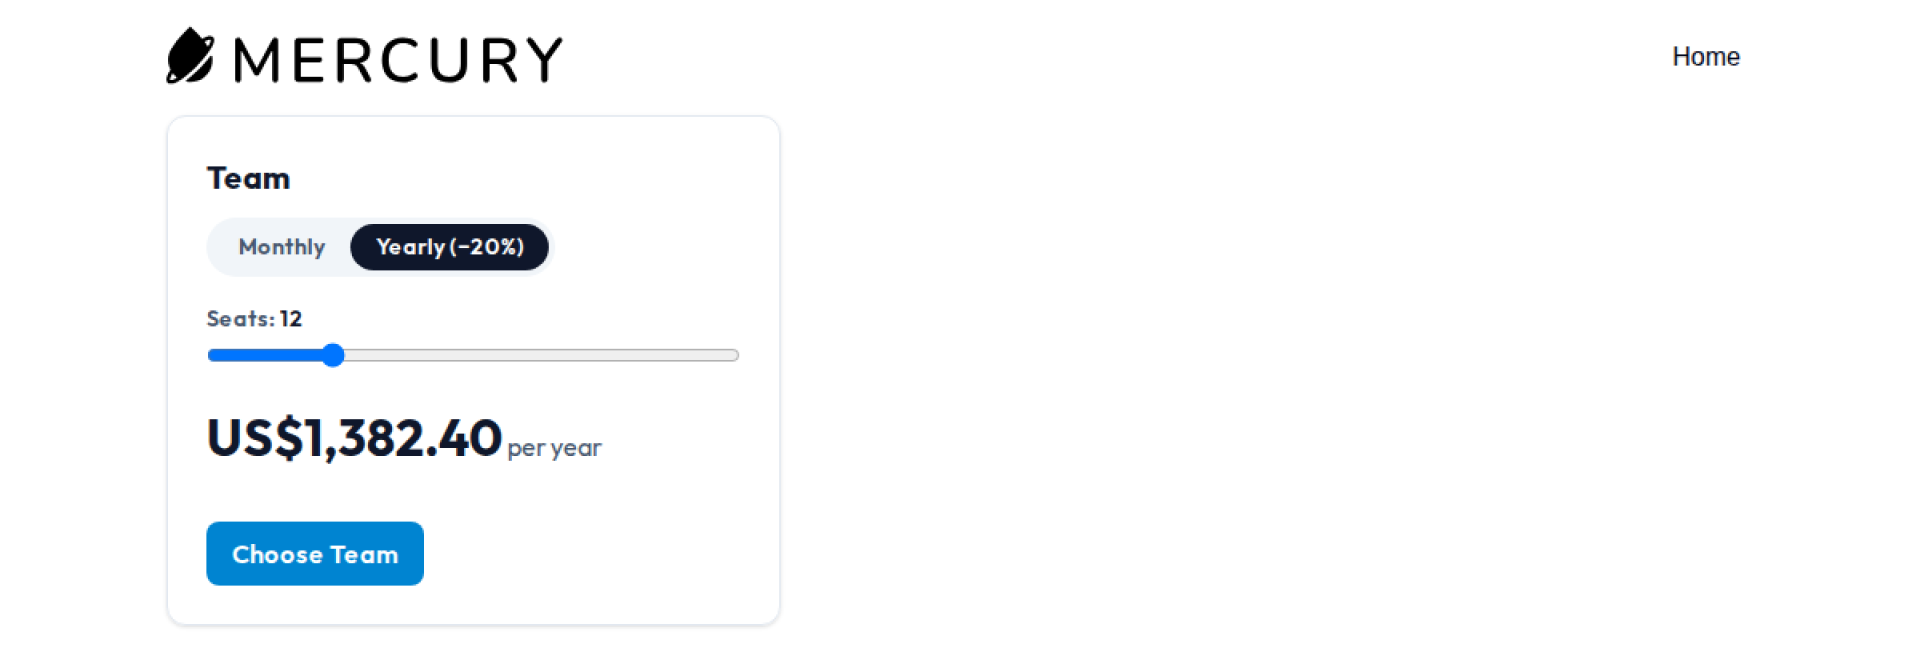
The component calculates the total from the editor-defined price and discount and the visitor’s chosen billing period and seat count. For the example values, 12 seats billed yearly at 12 per seat per month with a 20% annual discount total 1,382.40. Intl.NumberFormat formats that amount according to the visitor’s browser locale, so it may appear as $1,382.40 or US$1,382.40 for USD.
The useState hooks retain the visitor’s selections in the browser. Props come from the values editors configure in Canvas. The link appends the plan, billing period and seat count as query parameters; the destination must be implemented to read them. The component is a front-end demonstration, not an authoritative checkout or billing system. Production pricing requires server-side validation of prices, discounts, seat limits and submitted choices.
Canvas uses Preact’s React compatibility layer, so the react import and hooks work in this example. The cn helper is provided by the drupal-canvas package installed by the template and can merge Tailwind classes.
Step 6: Validate the Component
Run the Canvas validation command:
npx canvas validateThe CLI checks component definitions and source code. With a configured site and component to validate, it also contacts the Canvas site; template placeholder credentials cause an Authentication Error: Client authentication failed error. A successful run for this project ends with Valid: pricing_calculator.
Validation also checks naming rules. In testing, naming the URL prop signupLink while giving it the title “Sign-up link” produced:
Prop machine name "signupLink" should be the camelCase version of its title. Expected: "signUpLink".The YAML above uses “Signup link”, matching signupLink, so the name passes this check.
Step 7: Preview the Component in Workbench
Canvas Workbench is a local preview application for code components, described in its documentation as inspired by Storybook. Start it from the component project root:
npm run devWorkbench uses Vite and printed http://localhost:5173/ in testing. It listed Pricing Calculator in the sidebar and rendered the component with its example prop values and Tailwind styles. Select Yearly and move the slider to see the total and sign-up link change. To preview different prop values side by side, add a mocks.json file in the component folder, following the Workbench mocks documentation.
Step 8: Push the Component to Drupal
Exclude pages, content templates and page templates from the push:
npx canvas push --no-pages --no-content-templates --no-page-templatesThe CLI presents its proposed changes and asks you to confirm the target site URL. Review the plan carefully before choosing Yes. In testing, it reported Created: pricing_calculator, built Tailwind CSS and completed the push. A non-interactive invocation exited without pushing in the tested shell; use --yes only after reviewing the intended changes in automation.
These flags do not make the operation a strict one-file upload. The CLI discovers code components and can also synchronise global CSS; its documented push options can include Brand Kit assets. If Brand Kit changes are not intended, use --no-include-brand-kit when supported by your installed CLI and verify the preview. Keep a backup or export of site configuration before synchronising into a shared environment. See the Canvas CLI documentation.
A plain npx canvas push can also synchronise pages, content templates and page templates. The original test plan showed Page templates: 1 delete because the local project had no copy of the Starter site’s Mercury page template. The template remained in the test site because it was the default, but the proposed deletion shows why the restricted push flags matter. In that setup, npx canvas pull also skipped the home page and template because they used Mercury theme components rather than code components.
For a components-only project, the tested CLI README also documents sync.pages, sync.contentTemplates and sync.pageTemplates in canvas.config.json as project defaults that can replace the three command flags. The command flags were used in this walkthrough.
Beyond the local site. Pushing created the configuration entity canvas.js_component.pricing_calculator. Canvas’s configuration management notes describe synchronising code components between environments through Drupal configuration management. For sites deployed from a repository, push to a development copy, export the resulting configuration and include it in the regular deployment. A direct push to a production site that later imports the repository’s configuration can be overwritten.
Step 9: Place the Component on a Page
Open the Canvas editor at /canvas. The Code panel in the left navigation lists Pricing Calculator.
- Open the page navigator at the top of the editor and create a new page, or choose an existing page.
- Open the Library panel and search for “Pricing”.
- Pricing Calculator appears under Other. The search may also show Mercury’s Pricing card under Card. Use the menu beside Pricing Calculator and choose Insert.
- Select the placed component. The Settings tab displays Plan name, Monthly price, Annual discount, Currency, Maximum seats and Signup link, based on
component.yml. Numeric inputs are shown for prices and seats, and the currency dropdown uses the labels frommeta:enum. - In the tested interface, choose Review 1 change, select the change and use Publish 1 selected. The page changes from Draft to Published.
- Open the published page (the test page used
/page/2). Choose Yearly and move the seat slider. The total updates immediately. With the example data and 12 seats, the Choose Team URL ends in?plan=Team&billing=yearly&seats=12.
The Canvas editing preview in this test was used to select and arrange components. The billing toggle and seat slider responded on the published page rather than inside that preview. Your exact control labels or page paths may differ with Canvas and template versions.
After a push, the component can also be edited through Canvas’s in-browser code editor. Continue using the local project for new source files, static assets and npm dependencies.
Check That It Worked
Confirm that the component is enabled in site configuration:
ddev drush cget canvas.js_component.pricing_calculator statusThe tested output was 'canvas.js_component.pricing_calculator:status': true.
Run the canvas:doctor health check through Drupal core 11.4’s experimental dr command:
ddev exec vendor/bin/dr canvas:doctor --all-checksThe test reported “Clean bill of health! Your Canvas installation is healthy,” with additional advisory risks under --details. The --all-checks invocation returned a non-zero status in the test even with that summary; for scripted checks, use named checks such as --checks=config,content and confirm the exit behaviour with your installed Canvas version.
Troubleshooting
- Consumer tables missing after enabling Canvas OAuth. If the Step 1 query returns only
consumer_field_data, the consumer form or token endpoint can fail with errors such asTable 'db.consumer__grant_types' doesn't exist. This was reported in Simple OAuth issue #3630041, which remained open at the time of review. The tables were created normally in the tutorial test. Add reproducible steps and relevant output fromddev drush watchdog:show --count=50to the issue if affected. You need to set the OAuth2 private key.Verify the configured paths insimple_oauth.settings, file existence and permissions inside DDEV.Authentication Error: Client authentication failed. Recheck the client ID and secret in.env. Remove any duplicate placeholder variable entries.invalid_scope. Check which Canvas scope the CLI requests and whether the client and associated account have the necessary permissions. Avoid granting unnecessary scopes outside a local test.TypeError: tls.setDefaultCACertificates is not a function. This occurred with an unsupported Node.js 23 runtime in testing. Switch to a Node.js version supported by the installed CLI. The project’s.nvmrccan be used withnvm useorfnm use.- ESLint skips TypeScript files. In the tested template,
npm run code:check:eslintmatched.js,.jsx,.ymland.yamlfiles. Thenpx canvas validatecommand did check.tsxcomponents.
Once the site and local project are connected, subsequent components follow the same loop: scaffold, edit component.yml and the TypeScript component, validate, preview in Workbench and push the intended changes. For production use, add appropriate limits to numeric props and validate any pricing or sign-up data on the server.
References
-
State of Drupal presentation, September 2026 (7 October 2026)
-
Releases for Drupal Canvas | Drupal.org, Drupal.org
-
Simple OAuth (OAuth2) & OpenID Connect - Critical - Access bypass - SA-CONTRIB-2026-296 | Drupal.org, Drupal.org (4 November 2026)
-
Code Components | Drupal Canvas, Drupal Canvas
 Emily Mathew At TheDropTimes, I drive technical innovation and empower our team.
Image Attribution Disclaimer: At The Drop Times (TDT), we are committed to properly crediting photographers whose images appear in our content. Many of the images we use come from event organizers, interviewees, or publicly shared galleries under CC BY-SA licenses. However, some images may come from personal collections where metadata is lost, making proper attribution challenging.
Our purpose in using these images is to highlight Drupal, its events, and its contributors—not for commercial gain. If you recognize an image on our platform that is uncredited or incorrectly attributed, we encourage you to reach out to us at #thedroptimes channel on Drupal Slack.
We value the work of visual storytellers and appreciate your help in ensuring fair attribution. Thank you for supporting open-source collaboration!
ASK: Drupal Community Needs Your Support
View all →
Disclosure: This content is produced with the assistance of AI.
Note: The vision of this web portal is to help promote news and stories around the Drupal community and promote and celebrate the people and organizations in the community. We strive to create and distribute our content based on these content policy. If you see any omission/variation on this please reach out to us at #thedroptimes channel on Drupal Slack and we will try to address the issue as best we can.

Related Drupal Initiatives


Related Organizations


Related People


You may also like